Showing posts with label tutorial. Show all posts

Wednesday, 7 May 2014

New hair and Kardashian contouring

When I went to the hairdressers on Thursday I had 3 wishes:
1. Change my fringe up
2. Get it thinned
3. The most important- go lighter and blonder!


I took some steps to going lighter back in March and got some subtle blonde put through the end of my hair. This time I did a colour b4 to get rid of my red and dark dye and came out three shades lighter.  My hairdresser matched my roots to my new light brown and added a tonne more blonde to the rest.  Loads of layers and beginning of a side fringe later and it's looking a lot more like I want it to.  Khloe Kardashian is my current hairspiration but I'm taking it slowly as I'm not sure how blonde I want it yet.

Feeling very KK inspired, I did some heavy contour for a night out on Friday.  I much prefer a liquid contour to a powder- it looks far less stripey to me.


I use Collection lasting perfection concealer in the lightest and darkest shades (Fair and Dark, I think) and blend with a buffing brush.  Since using concealer is a heavy look, I find it looks best when skipping powder and foundation.  Blush and highlight are still key though.

Monday, 15 August 2011

A new dress and a matching eye shadow look

A new dress arrived for me from Ebay. I missed out on these River Island dresses last year and have been scouring Ebay for a while. Mine was £9.50. I love the tackilicious print.

DSCN1487

I wore it out on Friday and decided to do a matching eye look using my Hello Kitty Too Dolly palette as I’ve probably only used it once or twice.

DSCN1484 DSCN1480

Make up used

Face- Bourjois Healthy skin foundation and concealer, Rimmel Stay Matte powder, Nars Orgasm blush
Eye- Urban Decay Primer potion, NYX jumbo pencil in Milk, MAC Too Dolly quad, Gosh Kohl in White, C2000 Fast stroke liner, Mac Kohl power pencil in Feline, Maybelline Colossal mascara, Mac Embark eyeshadow.

How to

1. Prime your eye and add a white base every where you’ll be applying a bright shadow. This helps show the true colour
2. Highlight your inner corner using Yogurt.
3. Apply Too Dolly all over your lid, blending at the edges and applying more in the centre of your eye.
4. Blend Romping all along your crease and above crease, winging out towards the end of your brow. Blend down slightly into the Too Dolly, mixing the colours as you blend.
5. Apply a little Stately Black into the very outer crease (the end of the wing you have created) and blend.
6. Draw a line of white kohl along your upper lashline.
7. Draw over this with black liquid liner, drawing two wings. One straight from your upper lashes, and one from your lower lashes.
8. Fill the space you’ve created with your two liner wings with white kohl.
9. Line lower lash line with black kohl and add mascara.

Tuesday, 8 March 2011

DIY eyebrows

My eyebrows are scary. Long, misshapen and quick growing. I had them waxed every 4 weeks from the age of 13 to 19 and this didn’t do anything to make them grow less of finer. I always hated how out of shape they were until I started taking my brows into my own hands. They grew back so quickly and I couldn’t afford to get them done any more often so I decided to start waxing them myself.

Here’s how they look after about a week

DSCN1256 DSCN1257

A week after I’ve waxed them!

Here’s what I use

DSCN1263

Hair straighteners to heat the strips
Tweezers
Scissors
Old mascara wand
Superdrug Face & bikini wax strips

I start by brushing my brows and giving them a trim. This made a massive difference to my brows as I discovered a natural angled shape under my long hairs!

I then trim my strips to the required size for each bit of my eyebrow

DSCN1259

I then heat the strips by holding them between my GHD plates. You can use your hands but I find they work much better if they’re hotter.

Smooth the strip over the area you want to wax, hold taut and rip away! Tidy up any stray hairs with tweezers.

and Voila!

DSCN1264

DSCN1266

All ready to fill in!

Sunday, 31 October 2010

Halloween Costume

This year’s Halloween night out was rubbish! We found out on Friday that the night we were planning to go to had sold out however my best friend managed to score two tickets so her and I could go. Went to the club dressed up and found our tickets were not on the door so we couldn’t get in. Gutted!

Luckily I’d recycled my costume from 2 years ago- a zombie playboy bunny. G actually has a zombie Hugh Hefner costume to match but he’s never managed to wear his.

DSCN0926

I used Revlon Colourstay as a base and then whitened my face using white face paint. I “deadened” my under eye with MAC Blackground paint pot and a mix of greens, blacks and purple shadows from my 120 palette. Contoured my cheeks using MAC Scene shadow and wacked Barry M 101 on my lips(knew I’d need that corpse look at some point in my life!) For my bunny eyes, I lined the top with C2000 Fast stroke liquid liner and applied some massive human hair lashes from Eladora.

DSCN0927

Then I slapped on LOTS of fake blood. Add one bunny costume bought online and a very fake looking wig and voila! Zombie Bunnygirl.

DSCN0930

Sorry for the blurry pic. It’s the only full length one I got, as I was hoping to get more at the club.

Oh well, always next year!

Sunday, 4 April 2010

Removing glitter polishes

I love glittery nails. I don’t wear them that often because of the hassle of removing them. I’ve tried soaking them, rubbing them and nothing makes it easier.. until today!

I had to remove my BYS Glam glitter polish this afternoon and had been warned by Leanne that it was horrible to remove, so i thought I’d test out another removal tip I’d heard- and It worked!

You will need-

DSCN0108

Nail polish remover, cotton pad and tin foil.

First, soak a cotton pad in nail polish remover and hold directly to the nail, wrapping the pad around the nail

DSCN0109

Then take the tinfoil and wrap this over the cotton pad, holding it in place. Make sure it’s wrapped tightly over your nail

DSCN0110 This will now leave you free to let the remover really soak into your nails.

Leave it as long as you like and then pull off the tinfoil and remove whatever’s left of your polish using the pad.

This is all that was left of my glittery pink nail

DSCN0112

No pink polish and just a bit of glitter!

You could get these but this is so much cheaper and uses less polish remover.

Try it, it really does work.

XOXO

Sunday, 3 May 2009

Rainbow Brights

Hi Guys,

I recently bought a few new eyeshadows so I thought i'd do a couple of looks with them, to show them off and help demonstrate the different uses of brushes.

Rainbow Bright

I already applied a primer to my eyes as the colour will last longer. Using the short shadow brush by GOSH(no 3) I applied Passionate by MAC to the first quarter of my eye.
It doesn't look that bright but trust me, it's a really gorgeous vivid pink.

Then using W7 flat brush(no 5) I applied Jaffa and Bedazzle Dazzle powder by Collection 2000

These pigments are really cheap but most have a really nice sparkle to them and come in lots of vivid colours.


The green was taken from the w7 palette I mentioned in a previous post, I can't give you the name as I've left the name sheet at home. I, again used brush no 3 to apply this colour, blending it right out the corner of my eye. I took brush No 6 and blended all the lines between colours, taking care not to actually take any of the colour off.


The blue was also taken from the W7 palette and I used Lotusland and Lilac touch E/S by MAC underneath my eye. I blended a deep blue from the outer rim, to the middle, into Lilac touch and then into lotus land, using my no 3 brush.


Once I blended all the colours, blending the deep blue back out into the green, I added Black liquid liner by Collection 2000(my tried and tested favourite) and MAC Powerpoint eye pencil in Feline to complete the look

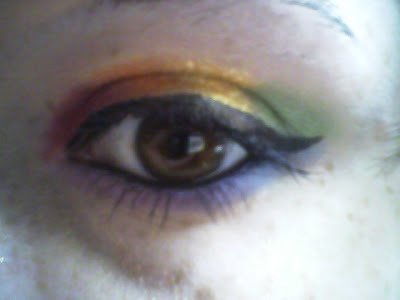

Pink orange Look

I wanted to do a quick look to show some of the other new eyeshadows I got recently.

I started with Soft Flower by MAC, which is a really nice peachy pink, and applied it over my whole lid using my No4 brush. Using the same brush, I applied a really pale shimmery peach as a highlight, right up to my brow. I then, used my No8 brush to apply Sunset B by MAC over the middle of my lid.


Then I used brush No5. to apply Jaffa Dazzle Me! pigment to the outer corner of my eye, using Brush No3 to apply Passionate by Mac along my crease, I then used brush No 6 to blend the two colours


I mixed the two colours and blended them along the lower lash line and again, added my usual black liners


Hope you've enjoyed these two looks. Have a look at my previous post to see which brushes I'm referring to.

Loveyax